Hello and Welcome Back.
So week one of my journey into games development has been fun. I’ve chosen a game editor and installed it, I’ve taken the time to get used to the interface, and navigated around my first 3D scene with ease. Four lessons in and I’m starting to get a feel on how to navigate around the interface and game windows.
Over these next few weeks I’m going to be focusing on completing the Unity Essentials Pathway, which is the first step into Unity Game Development. If you’d like to learn more about Unity Essentials you can find out more here:
Unity Essentials Pathway – Learn Game Development for Beginners | Unity Learn
Lesson One – Installing Unity Hub and Install Unity Editor Version 6
Lesson One was an easy one for anyone who’s used a PC or laptop. It just consists of installing the Unity Hub, and from that choosing a version of the Unity Engine to install. I went with version 6 as that is the version the Unity Essentials tutorials use.
Lesson Two – Explore the Editor Interface
In lesson two we begin to explore the interface we’ll be using to create our games in. We start by loading up a project and then a scene from within the project, before we start framing GameObjects in the Scene view using the hierarchy window.
We also learn how to use the view and pan tools and how to start and stop play mode, before saving our scene and heading to the next lesson.
Lesson Three – Master 3D Scene Navigation
Navigation is the game in lesson 3 and here we pick up some useful tips for navigating around our scene using shortcuts and the useful Flythrough mode. We also learn how to Orbit around a framed object and how to switch your view of the scene from Perspective to Isometric.
Along the way these skills are tested with a little game within the scene where you have to find the four digits from each object in the scene to formulate a code which you then input to get a little reward.
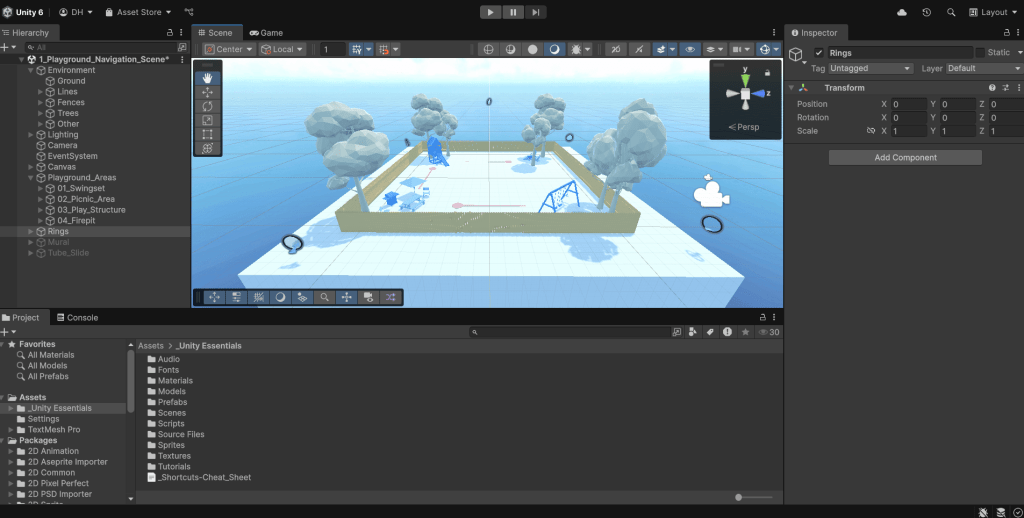
Lesson Four – Pass the Scene View Flying Test
This lesson involves flying around the edges of your scene through a series of rings placed at various heights and angles using first the Orbit and Zoom approach and then Flythrough mode. By the end of this exercise you find yourself more comfortable with these modes and begin to navigate the scene with ease.
Summary
It’s been a fun first week taking my first steps into a different world. Whilst the Unity interface can seem a little overwhelming at first glance, once you start to learn a few navigation techniques and shortcuts, you find that you can navigate with relative ease. The little games and tests within each exercise make what would normally be tedious a little more fun, and I can’t wait to keep going.
Next week I’m aiming to finish the Editor Essentials Mission and get through a good chunk of the 3D Essentials Mission where I’ll really start to have fun as I manipulate my first 3D scene.
Catch you next time,
Dan

Leave a comment