Hello and welcome back!
This week has been another bumper week where I managed to finish off the Programming Essentials mission, all of the 2D Essentials, and learn the basics of publishing in Publishing Essentials. This has all lead to publishing my first portfolio game, which you can find here:
https://play.unity.com/en/games/15d544c7-1fc1-4254-b0eb-0d2d04f46ab2/dans-unity-essentials-portfolio
If you’d like to learn more about the Unity Essentials pathway you can find out more here:
Unity Essentials Pathway – Learn Game Development for Beginners | Unity Learn
Lesson Four – Programming Essentials: More things to Try
Rounding out my Programming Essentials mission with this lesson I had the opportunity to add to my existing scene. First I added in code to allow my player to jump, which was an easy challenge to code. Secondly, I added triggers and code to the door elements of the scene so that the door opened when the layer drove near.
The final challenge was to use generative AI to create a script to simulate sunrise and sunset. I didn’t like the feel of this challenge as I thought it felt a little early to be relying on AI to create scripts, so skipped this challenge. It may be one however, I come back to at a later date.
Finally the mission ended with the quiz, in which I managed to answer all six questions correctly and gain a 100% mark.
Mission 5 – 2D Essentials
Moving on from Programming Essentials it was time to look at 2D Essentials and build my first 2D game. This mission gave me a good taste of what making a 2D game would be like, and since I haven’t actually decided if my first game would be 3D or 2D yet it was good to get the experience of both within this pathway.
Lesson One – Setup a 2D Room
The first thing that differentiates haw to create a 2D and 3D game is how you navigate and work within the environment to setup your scene. Obviously, 2D objects only work within two dimensions rather than three and how you view the scene is quite different.
After setting up my environment to be more 2D-centric, I then began the task of building my scene, which was a single room with furniture that we then add colliders and rigidbodys too in order to allow them to be moved by the player.

I also discovered how to use the Rect tool to move and scale the objects within the scene. I also learned how to duplicate objects, in this instance a chair, to be able to create a table with six chairs at it. Finally, I learnt how to set the aspect ratio of the scene during playtesting so that it matches the view that the user will see.
Lesson Two – Complete your 2D Puzzle Game
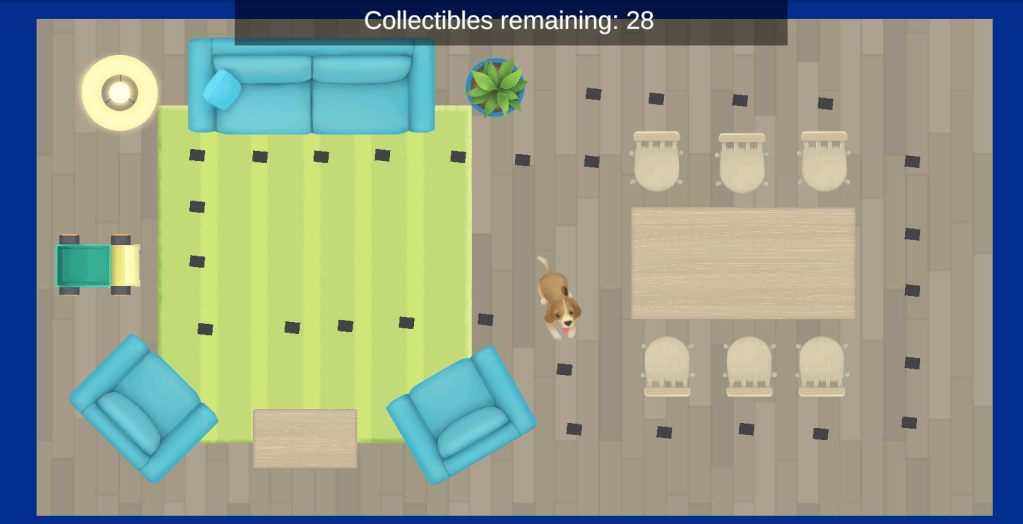
Next we finished setting up our scene by adding a rug sprite, and it was here I learned how to set the Order in Layer property of controls so that the rug appeared to be underneath the furniture in the room.
We also added out collectibles to the scene with rigidbody and collider components and added scripts to them to allow the collectibles to be collected. This gave me a basic scene where a player can traverse around the furniture in a room to collect items. Finally we added a banner to our scene that showed the number of collectibles that were still available.
Lesson Three – Add an animated Pet
In this lesson I was introduced to the concept of sprite sheets and Unity’s Sprite Editor, which I used to slice a sprite sheets into individual images and animated them to create a dog wagging his tail. We then added that to our scene and added rigidbody and collider components so that the player can gently nudge the dog out of the way as they collect items.
Lesson Four – 2D Essentials: More things to try
I rounded out the mission with some more challenges. The first was to add some colour to our walls so that the barriers of the room stood out. The second challenge was to change the layout of the room to make it more challenging for the player.
Whilst I did start to change the layout I realised that my three year old son would enjoy playing this little game, so changed the layout with him in mind. He loved it and spent a good 30 minutes playing with the scene and moving items, then resetting to get the collectibles again. He particularly liked nudging the dog about on screen. Poor dog! 😊
Finally, we ended with the Mission quiz, in which I got all 5 questions right, gaining another 100% mark. I do think the quiz at the end of each mission is a good way to help you feel confident in the knowledge your gaining through this course.
Mission 6 – Publishing Essentials
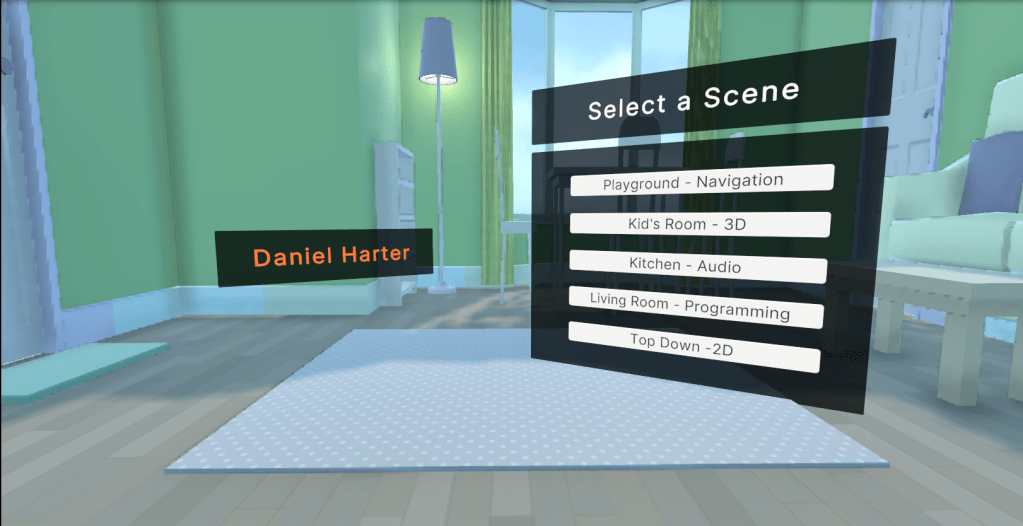
Now with our little games built it was time to look at publishing our portfolio for others to view. The first two lessons of this mission focus on tidying up your game ready for publishing. Adding some UI elements and a menu to it and setting your build and player settings to determine which scenes you will include and how the application is displayed on the target platform.
Finally, I published my portfolio to Unity Play to make it available to anyone with a browser!
Summary
Well four weeks in and I’ve published my first portfolio! I can’t tell you the buzz this has given me over the weekend, knowing that something I’ve created is out there. Yes its basic, and yes it needs a lot of work, but I’ve created that and that’s more than what I could have done four weeks ago!
I’m loving the pace of my learning and being able to produce tangible results.
Next week, I’ll focus on the additional challenges to round out my portfolio a little, and then finally finish the Pathway. I’m going to take a little time before choosing the next pathway to start planning my first game post tutorials and to tidy up the blog a little. I’m looking forward to seeing what I can do in my first post pathway challenge.
Catch you next time!
Dan

Leave a comment